


Additional articles
Even more tips, tricks, industry news, and more can all be found right here.
Professional Tips for Corporate Headshot Sessions
A strong corporate headshot can help someone stand out, long before they ever say a word. Whether it's for a company website, LinkedIn profile, or press release, having a polished, professional photo helps shape first impressions. It shows care, credibility, and confidence not just for the person being photographed, but for the business they represent.
That’s why it’s worth putting time and thought into headshot sessions. When done right, they can tell a story in a single glance. Whether you’re shooting one executive or an entire team, a good process helps everything go smoothly and leads to better results. From prep to post-production, a few key tips can make a big difference.
Preparing Clients for the Session
Before the camera ever clicks, the way clients prepare can shape the whole shoot. As the photographer, it helps to guide them every step of the way to make sure they look and feel their best. Clear prep also helps avoid last-minute confusion and delivers a more relaxed environment.
Here’s what to review with every client before their session:
- What to Wear
Stick to solid colors and avoid busy patterns or logos. Simple, tailored fits usually look best. Neutral tones like gray, navy, or soft blue work across most backgrounds. If the client needs to wear a company-specific wardrobe or uniform, make sure it's clean, pressed, and ready. - Grooming Tips
A fresh haircut or trim a few days ahead of time works well. Offer tips on taming flyaway hairs or managing shine, especially under bright lights. - Rest and Hydration
People naturally look more energized when they’re well-rested with a solid night’s sleep and regular hydration the day before.
One example: A law firm scheduled headshots for 15 employees on the same day. Half the team followed prep suggestions, the other half did not. The difference was clear. Those who prepped were quicker to photograph, looked sharper, and required fewer edits.
Better outcomes start with clear expectations. A simple prep guide or checklist helps clients show up feeling ready.
Setting Up the Perfect Photography Environment
The session setup plays a big role in how clients feel and look during the shoot. Creating a space that puts people at ease while also being functional makes all the difference.
Focus on these setup areas before starting:
- Lighting and Background
Soft, even lighting is your best bet for flattering headshots. Avoid harsh overhead lights that create shadows or uneven tones. Use diffusers or softboxes for better balance. As for backdrops, stick to white, light gray, or textured neutral tones that don’t compete with the subject’s outfit. - Test Equipment Before the Session
Don’t leave anything to chance. Test camera settings, strobe lighting, stands, and backdrops before the client steps in. Take a few test shots early to spot color issues or unwanted shadows. This keeps the session moving smoothly with fewer interruptions. - Create a Comfortable Atmosphere
Even professionals get nervous in front of a camera. Ease that tension with calm direction, a little small talk, and a relaxed pace. Play light background music if it suits the setting. Offer water or quick breaks between shots if needed. Small touches like these turn awkward moments into confident ones.
Taking a little extra time to create a strong setup can save you hours while editing later, all while making the session way more enjoyable for your client.
Posing and Expression Guidance
Most people aren’t sure what to do when they step in front of a camera. They freeze, they fidget, or they throw on an awkward smile. That’s where your coaching becomes key.
Help your clients ease into natural, confident poses:
- Start with Posture
Encourage an upright but relaxed stance. Shoulders back, neck extended, spine straight. A slight lean forward helps the image feel more dynamic and engaged. Avoid having them face the camera directly. Turn their body slightly while keeping their head toward the lens. It adds depth and comfort. - Guide Their Expressions
Expressions can make or break a headshot. Instead of default “serious faces,” ask them to think of a recent win, someone they enjoy working with, or an exciting goal. These triggers help create authentic, likable facial expressions without forcing a staged smile. - Give Real-Time Feedback
During the session, guide them with simple instructions like “relax your jaw,” “try a softer smile,” or “lift your chin slightly.” Let clients see a couple of preview shots on your camera so they understand how the poses translate to finished images. This builds trust and leads to better cooperation on the spot.
Props aren’t always needed, but in some workplaces, they can add relevance to the shot. For example, holding a laptop may feel natural for someone in tech. Just keep it understated and make sure the focus stays on the individual.
One startup founder struggled during his session. He didn’t know where to place his hands and kept shifting. Light conversation, approachable directions, and patience helped him find a relaxed pose that worked. His final image landed in a national feature.
Post-Shoot Editing and Delivery
What you do after the session can shape how your work is remembered just as much as the shoot itself.
- Photo Selection
During the culling process, look for clear lighting, sharp focus, clean posture, and natural expressions. Share a limited set of proofs so it doesn’t overwhelm your client. Quality beats quantity here. - Retouch Lightly
Edit with intention, not filters. Remove blemishes and smooth skin subtly. Don’t go overboard. Leave natural skin textures in place. The priority is making clients look like the best version of themselves, not turning them into someone else. - Final Delivery Matters
Be upfront about when they’ll receive their files. Deliver both high-resolution and web-optimized versions. Use clearly labeled files and folders. Add a thank-you message or usage tips—it shows you care about more than just the camera work. - Help Clients Use Their Photos
Most pros want to post right away, but might not know the full range of opportunities. Suggest bios, speaking event listings, resumes, LinkedIn, and email signatures. A simple usage list helps them get the most out of what they paid for.
Small, thoughtful touches during editing and delivery leave a strong impression and boost the chance that they’ll book again or refer others.
Making a Lasting Impression Through Headshots
Every step in the headshot process points to one major outcome: helping your clients feel great and look the part. The way people feel during the session often shows in the final product. That extra few minutes of prep, coaching, and encouragement stay with them long after the photos are delivered.
A corporate headshot is much more than a visual placeholder. It signals investment in one’s career, readiness to lead, and attention to detail. That small frame next to updates on LinkedIn or next to a name on a press release speaks volumes.
Photographers who listen carefully, coach their clients well, and deliver consistent results not only build trust—they keep people coming back. Showing up matters. Through clear guidance and a thoughtful process, you're giving people a photo that helps them do that with confidence.
Maximize the impact of your professional image with quality photos that reflect your brand. Learning how to approach corporate headshot photography the right way can elevate your presence across resumes, company websites, and profiles. Let PhotoDay® guide you with solutions that help you show up looking your best.

Building a Strong Photography Sales Strategy
Building up a solid photography sales strategy doesn’t happen overnight. It takes clarity, planning, and a deeper understanding of how people make decisions about buying photos. Whether you photograph school portraits, dance recitals, senior photos, or team sports, the way you present and sell your work can either move people toward purchasing or leave them feeling uncertain. A good sales approach isn’t just about pricing—it’s about presentation, customer comfort, and how easy it is to say yes.
A strong strategy keeps everything focused. It helps you run smoother sessions, manage expectations, and turn interest into actual orders. It’s not just about the transaction. It’s about setting up a system that works for your clients and helps you make the most of every photo you take. When you lay the groundwork with the right steps, you save time, improve the experience, and grow your reach.
Understanding Your Market
You can’t build a smart sales plan if you don’t know exactly who you’re selling to. A lot of photographers shoot across different categories, but each group you serve comes with its own habits, needs, and expectations. Taking the time to define your target audience helps you speak directly to them and design your strategy with purpose.
Ask yourself a few questions:
- Who am I working with most: parents, schools, athletes, or studios?
- When do they usually buy photos, and what formats do they like?
- What worries or questions come up before they commit?
It can help to look back at your last several sessions and see which ones pulled in the most orders. What kind of event was it? What was the age group? How was the session set up? Looking for patterns like these can give you clues about what people connect with and what doesn’t stick.
Looking at market trends also gives you a wider view of what’s changing and what people have grown to expect. For example, if your customers are used to seeing digital previews the same day, a delay of even a few days can feel outdated. By keeping an eye on what’s common or expected, you’ll spot ways to stay ahead and serve people better.
It also helps to narrow your focus a little. When you define a niche and lean into it confidently, you draw in customers who feel like you’re speaking directly to them. Instead of trying to be a photographer for everyone, aim to be the go-to choice for a specific kind of customer. Maybe it’s youth sports teams or local dance studios. Whatever it is, knowing your niche lets you build your message and sales approach around their exact needs.
Optimizing Your Offerings
Once you know who you're selling to and what they care about, the next step is making your packages actually appeal to them. Your pricing and product mix need to do more than cover your time—they should make it easy for someone to pick a package, feel confident in their choice, and look forward to the result.
Here are a few things to think about as you shape your offerings:
- Keep it simple. Too many options can slow people down. Offer a clear set of packages (maybe three tiers) so clients aren’t stuck trying to figure things out.
- Focus on what matters. If your audience mostly buys digital files, put more emphasis on downloads and delivery speed instead of physical prints.
- Add thoughtful extras. Items like keychains, framed prints, or extra edits can give clients the feeling of more value without overloading the package. Just make sure those extras match what they’re likely to want.
- Make the upgrade feel worth it. The jump from a basic to a more expensive package should feel logical, not forced. Instead of skipping features in the starter package, build upward by layering in more perks.
Don’t forget to check in with your clients after a session. Did they enjoy the photo viewing process? Were they happy with the products? Feedback gives you a clearer picture of what’s working and what needs tweaking. Even one small comment like “I couldn’t find my download link” could be a signal that your process or communication can be improved.
Product structure isn’t just about numbers and pricing. It's about creating options that feel right for your customers and reflect the care you bring to your sessions. The more you understand their habits and desires, the easier it becomes to guide them to the right choice. And when they feel good about what they picked, they’ll talk about it and come back next time.
Enhancing Customer Experience
Even if your packages and pricing are on point, a bumpy customer experience can affect your results. From first contact to final delivery, the entire process should feel smooth and stress-free. People want to feel respected, understood, and confident in their decision to buy.
The first step is clear communication. Keep your messages simple with timelines that are easy to follow. Don’t overload clients with too much info at once. Instead, space it out with reminders, updates, and next steps. A quick follow-up a few days after a session goes a long way in bringing people back to view and order their photos.
It also helps to reduce friction in the booking and buying process. Too many clicks to view photos or purchase? That might turn someone off. Think about how many steps your client has to go through. If you can cut that down, even slightly, you make the buying path easier to walk.
Once the session is over, don’t disappear. Good after-sales service builds trust. That can mean fixing download issues, answering questions about reprints, or even just checking in to say thank you. These small gestures matter and often lead to repeat business. For example, one photographer working with a local elementary school made sure to personally email parents with delayed orders during a system update. That small effort helped keep trust and build loyalty with families who came back the next year.
A positive experience can often be the reason someone refers you, even more than the photos themselves. Every part of your workflow is a chance to make that impression, so build habits that leave people smiling at the end.
Utilizing Technology and Tools
The tools you use shape how simple or complicated your back-end process becomes. With so much going on, automating routine tasks means you can focus more on shooting and client relationships rather than logistics.
Here’s where tech can make a difference:
- Digital galleries that are easy to browse and order from keep sales moving with minimal effort.
- Auto-reminders help clients remember ordering deadlines on their own.
- Fast file delivery systems allow families or teams to get their photos quickly without you handling each follow-up.
- Sales platforms with built-in marketing tools can send out promotions without you writing each one from scratch.
Another big piece of the puzzle is streamlining your editing and delivery process. Choose tools that help you organize images by client, quickly retouch groups of photos, and store everything safely. Not only does this save hours, but it also helps keep things clean and consistent.
Finally, no matter how good the tools are, they should work for you, not the other way around. When you pick a sales solution for photography, it should stay out of your way and help you get results without adding extra confusion. Good tech feels seamless and gives you space to create.
Making Your Strategy Work for You
Photography may be creative work, but when it comes to growing your sales, intention makes a big difference. Know who you're selling to. Create offers that make choosing easy. Deliver a smooth experience that keeps people coming back. Once you've done those things, the rest starts to fall into place with less effort.
The strongest sales strategies aren’t rigid. They're shaped over time by trial, reflection, and listening to clients. Whether you're working with small schools or running back-to-back sports sessions across town, having a smart workflow and clear offer brings you closer to your goals. Keep tweaking, keep learning, and you'll keep moving forward.
Streamline your photography operations and boost your sales effortlessly with PhotoDay®. Our sales solution for photography offers the tools you need to enhance every step of your workflow, making it easier than ever to deliver top-notch service and keep your clients happy. Discover how we can simplify your process and support your growth today.
Summer Event Photography Made Simple
Summer brings a certain kind of magic when it comes to photography. The days are longer, the weather is bright, and people are out making memories. The volume side of your photography business might be slow, but it’s an ideal time to explore other session types.
Pool parties, backyard weddings, outdoor festivals, and family reunions all invite opportunities for photographers to snap photos that feel warm and genuine. But while these events might look simple on the outside, capturing them well takes planning, flexibility, and the right tools.
There’s also a lot happening in a short time window. Kids running around, changing light from noon to dusk, and moving subjects all add pressure to get the shot right without missing a moment. The good news is that with some simple steps, you can walk into any summer event feeling prepared, confident, and ready to deliver. Whether you're working solo or with a team, building a smart workflow around summer shoots can help make even the wildest events feel more manageable.
Planning Your Perfect Summer Event Shoot
Before the camera ever comes out, a strong plan sets the tone for the entire session. It’s easy to assume that outdoor events are straightforward, but the more you organize ahead of time, the less you’ll scramble when things go off track.
Start with the location. Always visit ahead of the scheduled shoot if you can. Check where the sun hits during the expected event time and find shaded spots or natural backdrops you can work with. Have a backup idea in case the weather changes or the area becomes crowded or unavailable.
Different event types may need different approaches, too. Here’s how to shape your prep depending on the occasion:
- Family gatherings or reunions:
Coordinate with one person in the group who can help wrangle the crowd and know key groupings, such as grandparents with grandchildren or siblings. - Weddings:
Identify quiet moments and locations ahead of time for personal shots away from the crowd. - Festivals or public events:
Pack light, carry flexible lenses, and know the layout and schedule to stay ahead of photo-worthy moments.
Equipment prep matters just as much. Summer heat can affect gear quality, so carry extras like lens cloths, batteries, and memory cards that stay protected from harsh sun. It also helps to pack a collapsible reflector, a small stool, and a lightweight tripod if needed. Keep it all organized so you’re not digging through bags mid-shoot.
Once location and gear are in check, lock in your shot list. It shouldn't be strict, but it should guide your flow. Think about the photos your client wants most—group shots, candid moments, special decor, or performances—and work those moments into your plan.
Capturing Candid Moments
Some of the most meaningful photos aren’t posed. They happen in the laughs between friends, in a kid’s sticky smile during dessert, or while guests are caught up in conversation. Candid shots tell the real story of an event, and they often become client favorites because of how natural they feel.
To get these kinds of photos, you need to be ready without calling attention to the camera. Move with the event instead of standing still. Stay just far enough away to blend in, but close enough that you still capture clear expressions. Keeping your camera settings dialed in for different light areas helps you react quickly without missing anything.
A few simple tricks to help you blend in and grab great candid shots:
- Use a longer lens so you can stay back while framing close shots.
- Turn off the camera’s preview beep or flash so it doesn’t interrupt the moment.
- Watch body language. If someone looks tense or uncomfortable, wait for a more relaxed opportunity.
- Focus on moments that connect people—a toast, a shared look, or playful interaction.
Natural light does a lot of the work for candid shots. Aim to place yourself where subjects are lit from the side or behind, depending on the time of day. If the light is harsh overhead, move them near buildings, trees, or tents to soften shadows on faces. Golden hour—the hour before sunset—is great for warm-toned candids that look soft and inviting.
Capturing moments as they happen doesn’t require fancy moves. It just takes a little time to observe and feel out the flow of the event. Once you do, the most natural shots come on their own.
Working With Changing Light Conditions
One of the biggest challenges photographers face at summer events is keeping up with the light. Midday sun can cast sharp shadows and wash out details, while golden hour offers a warm glow that's perfect for portraits. If the event runs late into the evening, you're also dealing with low-light conditions that need a completely different setup.
Adaptability makes a difference here. When shooting under harsh sun, look for soft shade under trees, tents, or buildings to avoid squinting subjects and blown-out highlights. If you're stuck in direct sunlight, position your subject so their back is to the sun. That way, you get even light on their face and can avoid deep shadows under the eyes. Use your camera’s spot metering to expose the face properly and tweak the rest in post.
Golden hour is often the best light you’ll get all day. The low sun provides a soft, golden tone that flatters skin and adds depth to the background. Set your white balance manually if needed to keep colors warm and accurate.
Low light brings more complexity. Events that stretch into twilight or nighttime mean thinking ahead. Keep a speedlight or LED panel handy if flash is allowed. A fast prime lens with a wide aperture like f/1.8 or f/1.4 can help gather as much light as possible. Always shoot in RAW so details aren’t lost when exposure or white balance needs adjusting.
To better handle the variety of lighting situations all in one day, pack these basics:
- A basic reflector to bounce or soften light
- A diffuser or scrim to lessen the harshness of midday sun
- A variety of lenses that perform well in low light
- Spare batteries, since electronic gear drains faster with heavy use
Shooting in changing conditions doesn’t have to be overwhelming. Practice, patience, and a starter plan can help you get solid results in just about any light that summer throws your way.
Editing and Delivering Beautiful Summer Event Photos
Even with great shots, your work isn’t really finished until you've edited and delivered the photos. Post-processing ties the whole shoot together and gives it a consistent tone and feel. The trick is to find a style that enhances your images without overdoing it.
Start by adjusting exposure, white balance, and contrast. These basics will clean up the photo while keeping it natural. Don’t over-sharpen or push the saturation too far. Summer photos often already pop with their bright colors and open light. Consider keeping edits subtle and letting the original scene shine.
Batch processing works well for events since you're often editing hundreds of images. Once you dial in a set of adjustments, apply them across similar shots to save time and keep things uniform. Just make sure to double-check each group of images, so you don’t miss a photo that needs extra care.
After editing, make it easy for your client to view and share the results. Here's a smart delivery plan to keep things smooth:
- Organize images into folders by moment or activity, such as prep, ceremony, or reception
- Use an online gallery tool to share everything quickly through a private link
- Resize for web and print if your online platform doesn’t automatically offer both versions
- Double-check download permissions and gallery settings before sending
Timely delivery leaves a strong impression. If you can send previews within a few days, clients stay excited and engaged. It also gives you a chance to build trust by showing you’re on top of things. A well-organized gallery not only helps the client enjoy their photos but also makes it easy for them to share with family and friends.
Bring Your Summer Photography to Life
Summer shoots are busy, but that’s part of what makes them fun. Every event is a little different, and unexpected happenings can turn into the best photo opportunities. That’s why going in with a clear game plan, solid gear, and photo solutions that work in any light can make all the difference throughout the long, hot season.
Whether it's working around the sun, catching a genuine smile, or turning a chaotic moment into a storytelling shot, summer events have a certain energy that deserves to be captured. Let your personality come through in the photos, stay flexible, and lean into what makes each setting unique. When you put all those pieces together—the prep, the timing, the edits—the results are something clients will cherish for years.
Ready to step up your summer photography game? Explore how PhotoDay® can streamline your workflow with effective photography solutions to make the most of every event you shoot. By making editing and delivery smoother, you can focus more on capturing those memorable moments.

Creating Attractive Event Photography Packages
Planning how to sell your event photography services can be tricky. You want your clients to feel like they’re getting exactly what they need without being overwhelmed by choices or hidden costs. At the same time, you need your packages to reflect the time, effort, and creativity you’ll bring to their event. Building a photography package for events doesn’t have to be complicated, but it does need to feel thoughtful and flexible.
A good event photography package stands out when it speaks clearly to your client. Whether you're shooting a wedding or a casual family party, your package should make them feel confident they’re hiring someone who’s got it handled. It’s also your chance to show all the value you offer without having to explain every detail during every inquiry. A strong package layout does the talking for you—one that’s simple, well-priced, and clearly structured for different types of events and client needs.
Understand Your Audience
Not every event calls for the same kind of coverage, so it helps to think about who you’re creating packages for. A wedding client won’t have the same expectations as someone planning a birthday party or a company hosting a fundraiser. That’s why a one-size-fits-all approach doesn’t really work. Taking time to understand the type of event helps you better plan your package options and pricing.
Here are a few examples of event types that often pull in different photography needs:
- Weddings: Clients usually want a mix of staged couple and group photos, quiet candid moments, speeches, décor details, and full-day coverage.
- Birthday parties or family events: These are more casual, usually shorter, and focus more on candid photos of reactions, games, and decorations.
- Corporate events: These often involve headshots, speakers, interaction photos, and general coverage that shows brand presence and sponsors.
Before you put a package together, ask a few guiding questions:
- What type of event will it be?
- How many hours of coverage do they expect?
- Are there specific shots or moments they want?
- What’s the vibe—formal, fun, or somewhere in between?
- How do they plan to use the photos?
Sending out a short form, scheduling a quick intro call, or including these types of questions in your booking process can help you gather this info up front. Once you know what your client cares about, it’s easier to build a package around their priorities instead of guessing what works.
Components of an Event Photography Package
Once you understand the event type and what matters most to each client, the next step is deciding what goes in your photography package. The contents should feel complete, but not overloaded. You want to strike the right balance between what’s included and how flexible the package can be if someone wants to add more.
A basic event photography package will usually include:
- A set number of hours of coverage
- A minimum number of edited photos
- Delivery via digital gallery
- Standard post-processing of images
From there, you can offer upgrades like:
- Additional hours
- Prints or photo books
- On-site photo booths
- Custom USB drives or keepsake boxes
- Fast-track delivery
You might also offer multiple package levels that help clients see the difference in value. A good way to do this is with three tiers:
- Basic: Covers the event with limited hours and fewer processed images.
- Mid-Level: Adds coverage, more photos, and maybe an extra item like a small print order.
- Deluxe: Full-day coverage, all edited images, prints or a book, and anything else included in the mid-tier.
Each level should be clear and not overly technical. Labeling them with simple names like Basic, Classic, and Complete can help avoid confusion and make the offer feel more approachable.
Don't forget to design your packages with flexibility. Clients appreciate it when you're able to tweak an option to better fit their needs, even if it's just one extra hour or a few additional shots. Keeping the structure clean, while still being open to adjustments, makes the booking process feel smoother for everyone.
Pricing Your Packages
Setting the right price for your event photography packages can feel like walking a tightrope. Charge too low, and you may not cover the time and effort you put in. Go too high, and you risk losing interest from potential clients. The sweet spot is where your price reflects the value you offer while still being reasonable for your target audience.
One way to organize pricing is by building a tiered structure. This gives people options to choose from based on their budget and needs. Starting with a basic option keeps it accessible, while still making room for higher-end packages that add more value. Here’s a simple example of what those tiers might look like:
- Basic: A 2-hour session, a set number of edited digital photos, standard image delivery.
- Standard: Adds an extra hour, more images, plus one print item or faster turnaround.
- Premium: Full or half-day coverage, more editing, a custom-designed photo album, and hand-delivered prints.
Everyone loves to know what they’re getting. That’s why it’s important to write out exactly what’s included in each package and present it in a clean, easy-to-scan format. Most clients won’t read through long descriptions—they want bullet points and clear differences between each level.
You’ll also want to explain your process and fees clearly. Include any additional charges for travel, rush delivery, or extra hours. Keeping everything upfront helps avoid confusion later. If a client wants to shift something, having a solid pricing foundation makes it easier to adjust.
Think about offering seasonal pricing bundles. For example, you might create back-to-school or holiday-specific packages with a limited availability time frame. This can help attract clients who prefer to book around certain dates and gives you a chance to plan your calendar better.
Marketing Your Packages
Once you’ve got your event photography packages built and priced, the next step is getting the word out. A great package doesn’t mean much if clients don’t know it exists or can’t find the information easily. That’s why smart, simple marketing makes a big difference.
A few practical ways to start promoting your event packages:
- Build a dedicated page or section on your website that lays out each package clearly, including pricing and sample images.
- Use visual previews like grid layouts, sliders, or PDF downloads so clients can easily compare packages.
- Share past event photos on platforms like Instagram, Facebook, and X with short stories about what was included.
- Post seasonal offers—like limited-time discounts or themed photo shoots—to drive short-term interest.
- Pin stories or highlights that walk through your package layers and explain the kind of events each one is best for.
Marketing shouldn't be a guessing game. Keep the focus on the problems your packages solve—clear timelines, professional delivery, easy access to finished photos, and a great client experience. The more relatable and straightforward your content is, the better it performs. If you have satisfied clients, ask if they’re open to sharing their gallery or a few kind words on your page. Seeing a recent event backed by real photos helps inspire confidence more than a wordy description can.
Even small additions like a PDF with FAQs, or a pinned post that explains what you offer, can help cut down the time you spend answering the same questions. It keeps the buyer journey moving even while you’re out shooting or editing.
You're Not Just Selling Photos—You're Selling Peace of Mind
A well-designed photography package doesn’t just tell a client what they get—it shows them what they can expect from working with you. It helps create trust before the contract is even signed. When your packages match what they care about, you’ve already done half the job.
The goal isn’t just to fill your calendar. It’s to build something that works for both you and your clients. Something easy to understand, flexible enough to adapt, and strong enough to show the value you bring. When clients know they’re in good hands, they come back, and they tell others, too. That’s where real growth lives.
Let your event shine with a photography package for events that’s custom-crafted to fit your vision and needs. PhotoDay® makes it easy to capture every unforgettable moment with options that match your style and schedule.
Simplifying Your Photo Workflow Process
When you're managing photo sessions with dozens or even hundreds of people, things can get messy fast. Between staying on top of shoot schedules, making sure you're capturing everything you need, and then turning around edits and final deliveries, it’s easy to feel overwhelmed. Having a solid photo workflow isn't just helpful—it saves your time, keeps things stress-free, and lets you focus more on your craft instead of scrambling behind the scenes.
That’s where an online workflow for volume photos steps in. By building structure into your process before, during, and after the shoot, you're setting yourself up for smoother sessions and faster turnaround times. Rather than juggling too many tools, tracking info by hand, or repeating tasks you already handled once, a good workflow keeps everything flowing effortlessly from start to finish.
Pre-Session Planning and Organization
Strong sessions don’t start when the first subject steps in front of a camera. The real workflow begins before that, when you’re organizing the plan behind each shoot. Pre-session prep sets the stage for an efficient day, and when done right, reduces surprise hiccups later.
You want to avoid guesswork once you're on site. That starts with clear scheduling—knowing when and where to be, and how many people you’re working with. If it’s a sports photo day, for example, be clear on which team is showing up when. Leave buffer time between groups to account for delays, gear adjustments, or reshoots.
Next, get organized with:
- A master checklist of the gear you'll need (camera bodies, lenses, lighting equipment, backup batteries)
- A digital or printed session sheet that includes contact info, event location, team or student breakdowns
- A clear plan for how you’ll gather subject info: name tags, QR codes, or a paper roster
Communication matters, too. Talk with the coaches, school coordinators, or dance instructors ahead of time. Help them understand the flow so they can keep everyone moving when things get busy. Confirm locations, times, and logistics well beforehand. Avoid any last-minute surprises by checking the weather, parking, and facility access early.
When planning becomes a habit, you minimize what could go wrong and leave space for doing your actual job: capturing great photos under pressure.
Streamlining the Picture Day
Once shoot day rolls around, preparation pays off, but only if you stay on plan. There's a lot going on during volume sessions, and you don’t want to burn time figuring it out on the fly.
Start by setting up your station in a way that supports continuous movement. An assembly-line style works well for most volume events like school portraits, sports teams, or dance recitals. That means stations for check-in, posing, photography, and exit. If you don’t have assistants, you can condense the process, but keep it consistent. A clear flow helps subjects understand where to go next without having to ask questions every time.
Here are a few more shoot-day tips that keep things smooth:
- Use markers or tape on the ground to show posing positions
- Set lighting once and avoid major changes unless absolutely needed
- Batch similar poses or teams together back-to-back so you’re not adjusting between every shot
- Keep batteries charged and memory cards cleared before arriving
If you’re photographing kids, patience goes a long way. They need fast direction, simple instructions, and a little fun to soften any nerves. Whether it’s a team of five-year-olds or a lineup of high school seniors, stay upbeat and light on your feet.
At the end of the shoot, back everything up right away. It takes just a minute or two and can save major stress down the line. Small actions like this are what make workflows run smoother without having to overhaul your whole system. When you show up ready, you leave with good images and peace of mind.
Efficient Post-Processing
Once the photos are captured, post-processing is where things can really slow down if you're not careful. Volume sessions demand a workflow that moves fast without losing quality. Whether you're dealing with school portraits or dance studio shoots, without a good system in place, the number of files alone can feel overwhelming.
One of the simplest ways to keep things moving is to adopt batch editing. This helps you apply standard adjustments like exposure, contrast, or white balance to multiple images at once. If you're shooting in consistent lighting, this can save a ton of time. Many photographers also create presets for certain sessions so they don’t have to start from scratch every time. When used correctly, presets keep your work looking consistent and prevent you from spending hours tweaking each file.
Here are a few other ways to streamline your editing process:
- Rename files in batches using a date or event name for easy sorting
- Use star ratings or color labels to flag the best images quickly
- Automate repetitive steps like cropping or file exporting with workflow software
- Back up edited files to a cloud service as you go to avoid data loss
It's also a good idea to review your process after each event. Ask yourself what slowed you down. Was it hard to find the best takes? Did you forget to apply a preset before editing? Simple changes after one session can shave hours off the next. Keep track of shortcuts that work and repeat them. The more you refine it, the faster things move each time.
Seamless Delivery and Client Communication
When managing large photo orders or galleries, delivery isn't just about sending files. It's about making sure clients know what's happening, where to find their images, and how to access them with zero confusion. A smooth experience keeps them coming back and makes your life easier.
Clear communication from the start helps prevent missed messages and late requests. Once your gallery is ready, send out organized announcements or reminders to let people know it's live. This might sound basic, but plenty of issues pop up when people don’t have the access info they need.
To stay organized with client communication:
- Send updates at each milestone—notice of gallery launch or deadlines to order
- Use templated emails or messages to save time while keeping your voice consistent
- Include helpful instructions with each message, like how to download photos or place orders
- Offer support contact info in case parents or team members have trouble accessing their gallery
Automating this process can cut down on the time you spend replying to emails. Set up reminders for expiring galleries or upcoming deadlines. The fewer people you’re chasing down, the more time you can spend on photo work. It’s all about giving the client a good experience while staying sane on your end.
Make Workflows Simpler One Step at a Time
Every photographer works differently, so no two workflows will look exactly the same. But if there’s one thing that works across the board, it’s building a process you can rely on enough to handle the messiest parts of volume work while giving you space to focus on photography. The more you plan ahead, the fewer snags you hit. When you prep, shoot, edit, and deliver with structure, each part of your job clicks into place.
Great workflows aren’t built overnight. They come from small shifts that stack up over time. Ask yourself: where do I lose time? What steps keep repeating? Even something as minor as switching up your battery charging routine or uploading backups right after a shoot can bring more ease to your day. The goal isn’t to be perfect. The goal is to make your process feel light, clear, and ready every time you pick up the camera.
Ready to make your photography workflow more intuitive and efficient? Discover the advantages of an online workflow for volume photos with PhotoDay®. Streamline your sessions, boost efficiency, and see the difference preparation and organization can make. Start today and transform how you manage high-volume sessions.
Time Management Tips for Sports Season Photography
When you're photographing sports during a packed season, there's a lot going on. From school matchups to community league playoffs, the schedules never slow down. As a photographer handling several teams and events, your time is your biggest asset. Managing it well can mean the difference between smooth sailing and last-minute chaos. Between planning, shooting, editing, and staying in touch with customers, every minute has to count.
Photography during sports season demands more than just great talent behind the lens. It calls for systems that keep things moving without getting in the way of creativity. If you're dealing with multiple teams and events each week, high-volume photography solutions are key. That also means building structures that help you stay on track from the first booking to the last delivery.
Pre-Season Preparation
Before the first whistle blows, you've got a golden window of time to get organized. Pre-season is when you lock in schedules, get your gear in order, and make sure no task slips through the cracks. Planning before things get busy saves you from headaches later and helps you stay flexible when surprises come your way.
Here’s how to make the most of that prep window:
- Review your upcoming season’s events and create a master calendar. Include team names, locations, and shoot preferences.
- Communicate with event organizers early to confirm schedules, game times, and shoot locations.
- Double-check your equipment. Charge batteries, restock supplies, clean lenses, and test backups.
- Build a packing checklist to avoid wasting time looking for gear on shoot days.
- Block out time on your calendar for editing so you don’t fall behind once the season picks up.
- Automate what you can. Forms, contracts, and check-ins should run on autopilot as much as possible.
Let’s say you’ve got five team photoshoots and two tournaments lined up before fall break. Without a solid system, just keeping the names and dates straight can feel overwhelming. Having all your locations and event details stored in one place can keep you focused, even during the busiest weeks. Cutting down on mental clutter means more time to focus on capturing the moment.
Pre-season isn’t just about getting ahead. It’s about removing small hurdles before they grow into big ones. That way, when crunch time hits, you’re ready.
Efficient Workflow During Picture Days
Once you're out on the field or court, things can move fast. You’ve got a tight window to get clear shots of players, team portraits, and action sequences, all without slowing down the event. That’s why your photo-day workflow needs to run smoothly from start to finish.
The key is to keep things structured but flexible. Here are some ways to stay productive on the job:
- Plan your photo setups in advance. Have team positions and lighting tested ahead of time.
- Bring help if possible. Assistants can manage crowds, organize teams, and gather release forms.
- Group similar shots together. Batch individual poses first, then take team pictures immediately after.
- Use a clear signage system to guide players and parents through the photo area.
- Keep backups ready. If one camera or lens quits, you’ll avoid wasting time troubleshooting.
It helps to show up early and walk through the site layout. Know where your light sources will be, what background you're working with, and where to position teammates for their turn. This helps prevent downtime and lets you focus on shooting, not solving issues on the fly.
A strong workflow cuts down delays and helps you hit your deadlines later. The more you can automate or prep before anyone even shows up, the smoother your shoot days will go. When you’ve got more than one event a day or back-to-back weekends of games, every saved minute adds up quickly.
Quick Editing and Turnaround
Once the sessions are done, editing can sneak up fast, especially during sports season when you're juggling back-to-back events. There's usually no shortage of photos to go through, and without a clear process, post-production can eat up more time than expected. The trick is to create an editing system that matches the pace of your shooting schedule and doesn’t burn you out.
Start by batching your edits instead of jumping between client galleries or different events. Group similar image types, like all headshots or team photos, and run through them in one sitting. This keeps your mind focused on a single style and helps you move quickly.
Use editing presets or templates that suit your style. This helps keep images consistent and avoids having to start from scratch every time. If you shoot in similar lighting conditions across fields or courts, a few adjustments up front can go a long way.
Backing up your files right after a shoot keeps your workflow cleaner, too. Label folders with date, event name, and team so you’re not wasting minutes trying to track down the right batch. It sounds simple, but small habits like this can save hours later.
Here are a few ways to keep editing from piling up:
- Schedule editing blocks on your calendar, just like you would a photoshoot.
- Work through events in the order they were shot to avoid skipping around.
- Use culling software that can group similar images or rate them quickly.
- Keep an eye on your turnaround promises and update clients if there’s a delay.
- Outsource part of your editing if you’ve maxed out your availability.
Fast turnaround helps keep the momentum going, especially with teams that are eager to share their photos while the excitement is still fresh. While quality always matters most, speed makes a big impression during sports season.
Managing Client Expectations and Communications
Time management isn’t just about your calendar. It’s also about how you handle conversations with organizers, coaches, and parents. A clear communication plan can prevent misunderstandings, missed deadlines, and late-night email sessions trying to fix things that were unclear from the start.
Set expectations from the very beginning. When someone books a session, give them clear information about timelines, delivery, and next steps. A short welcome guide or quick bullet list works well. You don’t need a fancy packet, just something that outlines what they should expect and when.
Be upfront about turnaround times. You can say something like, "You'll get a preview within three days and a final gallery within ten." That gives people a timeline to hang on to and gives you some breathing room to finish without scrambling.
Reach out before people feel the need to follow up. A quick check-in message after a shoot helps clients know things are moving forward and builds trust along the way. You don’t have to send daily updates, just the right nudge at the right time.
Here’s how to avoid time-consuming communication gaps:
- Use email templates for common messages like gallery deliveries and shoot reminders.
- Include links to FAQs or details that clients ask often.
- Batch reply to messages at the same time each day to avoid constant interruptions.
- Make your contact info easy to find so no one wastes time trying to track you down.
When clients know what’s going on and feel informed, they send fewer messages asking for updates. That gives you more time to focus on shooting and editing instead of getting buried in your inbox.
Keep the Momentum Going Post-Season
Once the season wraps, it’s tempting to shut down and rest. And you should. But it’s also a good time to reflect on what worked and what didn't, while everything's still fresh. Using the off-season to tighten up systems, rework processes, and prep for next year can make a big difference when things get busy again.
Go back and review your notes from the season. Which events ran on time? Which days felt overloaded? Maybe you noticed that setup took longer than expected or that gear transport wasn't as smooth. Write it down while it's still fresh and mark changes to make for next time.
Post-season is also a great time to update marketing materials, organize sample galleries, and connect with schools, teams, or leagues for feedback. You don’t need to overhaul everything. Focus on one or two areas that caused hiccups during your busiest weeks.
Some quick wins in the off-season include:
- Updating your contact and booking process
- Refreshing email templates with clearer instructions
- Organizing your picture day kits or bags
- Creating a simple prep guide for new clients
- Reworking how files are labeled, sorted, or backed up
You can also use this time to build relationships. Reach out to past clients with a thank-you message, follow their teams on social media, or offer early booking options for the next season. Keeping those connections warm makes future scheduling smoother.
Master Time Management and Thrive
Shooting sports photography across a full season takes planning, energy, and follow-through. But if you’ve got repeatable systems in place and a clear approach to managing your time, it gets easier with every event. You can worry less about what might go wrong and focus more on what makes your work shine.
When you've prepared ahead, set up smart workflows, and stayed on top of communication, you're in a better spot to deliver great work without wearing yourself out. You save time for the parts of the job you actually enjoy—capturing moments and seeing the reactions when clients first see their photos.
At the end of the day, time management isn’t about cramming more into the schedule. It’s about building smoother days that don’t drain your focus. And when the next season rolls around, you’re ready to take it head-on with confidence and a plan that works.
Ready to enhance your photography workflow this sports season? Discover how high-volume photography solutions can help you simplify your process and stay on top of every event. With powerful tools from PhotoDay®, you can focus more on capturing the action and less on managing the chaos.

Marketing Strategies That Drive Photography Sales
Marketing is a make-or-break part of running a photography business. Capturing great shots is just one piece of the puzzle—getting those photos seen and sold is where strategy comes into play. Knowing how to position your brand, reach the right people, and build trust with potential clients can help you book more sessions and sell more prints without constantly chasing leads.
It’s not about doing everything at once. It’s about planning and choosing what works best for you. Whether you're looking to fill up your school photo calendar, grow your sports photography base, or drum up senior portrait bookings, having a smart approach can help you consistently grow sales in photography over the long haul.
Identify Your Target Audience
The first step to improving any type of marketing is understanding who you're actually trying to reach. If you haven’t clearly defined your target audience yet, your efforts might be missing the mark. When your message tries to speak to everyone, it often ends up connecting with no one.
To narrow things down, think about what type of photography work brings in the most value to your business and makes up a meaningful part of your schedule. Do families with school-age kids hire you most often? Are you known locally for your dance recital setups? Once you pinpoint the group that’s best aligned with your services, you can tailor your marketing around what they care about.
Here are a few helpful ways to get started:
- Look at your past bookings and ask yourself: what do these clients have in common?
- Write down common questions or concerns that come up during the booking process
- Browse local social media groups or community pages to see what types of photography experiences people are talking about
- Interview a couple of current or former clients to learn what stood out to them
Building a simple buyer persona can also help. This is just a rough sketch of your ideal client. It could include their age range, interests, common challenges, and what type of session they’re usually shopping for. Over time, this profile can evolve as you notice patterns or grow into a new niche.
Making your content and messaging match what your audience wants keeps your business top of mind when they’re ready to book. It also lays the groundwork for showing up confidently in the places they’re already spending their time.
Leverage Social Media Platforms
Social media continues to be one of the most effective ways for photographers to share their work and attract new clients. But it takes more than just uploading a photo or reel and hoping people discover it.
The key is being intentional. Choose one or two platforms where you're most likely to engage with potential clients. Instagram is ideal for showcasing visual work, while Facebook works well for connecting with local communities and families. Pinterest can also be helpful for reaching parents planning events or searching for portrait inspiration.
Try mixing things up with different content:
- Behind-the-scenes clips of a shoot setup or editing workflow
- A short spotlight on your favorite photo from a recent session and what made it special
- Client testimonials shared as image captions or stories
- Polls or questions that let your audience share feedback or ideas
- Seasonal photo reminders like “Back-to-school photos coming soon”
You don’t need to post every day, but staying active a few times a week builds visibility and gives your followers something to connect with. Don’t forget to respond to comments and messages quickly. Being present and personable goes a long way in building trust.
It can also help to keep a loose content calendar that matches your photography schedule. For example, in July, you might start sharing sneak peeks from summer sports events or start talking about booking dates for back-to-school portraits. That way, you’re always one step ahead without having to scramble to find something to post.
Optimize Your Online Presence
Your website can do a lot of the heavy lifting when it comes to pulling in new clients. That’s where people go to decide whether or not they want to work with you. It’s not enough to just have a photo gallery and contact page anymore. To build trust and increase bookings, your site should tell a clear story about what you do and who it’s for.
Start by making sure basic info is easy to find. This includes the services you offer, what your general pricing looks like, and how people can book with you. Keep the layout simple so visitors can get where they need to go with minimal effort. Strong, clean navigation makes a big difference for first-time browsers.
If you haven’t already, consider starting a photography blog or adding fresh content blocks that are updated monthly. These can cover topics like prepping for a school session, what to wear during a photo shoot, or how to pick the best location. Each time you publish something new, it signals to search engines that your site is active.
Here are a few tips to help improve SEO on your site:
- Use headlines and subheadings that match common search terms (like “senior photo tips” or “dance recital photographer near me”)
- Label images with descriptive titles and alt text
- Name pages with keyword-friendly URLs
- Write clear and natural page descriptions
- Link blog or portfolio posts back to your main service pages
When paired with other strategies like social media and email marketing, your website becomes a strong foundation for driving consistent traffic. Just make small updates often and keep the focus on what your ideal client wants to see.
Utilize Email Marketing Campaigns
Sending emails is one of the easiest ways to stay connected with clients throughout the year. A few well-timed messages can remind clients to book, introduce a new service, or bring attention to time-limited promotions. It’s also a great way to build long-term loyalty with families or schools that come back every season.
When creating email newsletters or campaigns, keep your main message short and focused. Use a friendly subject line that feels casual, then include one main image and a brief sentence or two explaining why you're reaching out. Don’t overload it with graphics or long paragraphs. Simple is better.
Here are a few email ideas you can rotate through:
- A “last chance” reminder just before booking closes for a seasonal event
- Back-to-school or holiday-themed promotions
- Feature of a recent session with a short client story
- A birthday or graduation message with a photo offer attached
- Tips to help parents or students get ready for their session
Segmenting your list, even in basic ways, pays off too. Maybe you send different emails to school clients and dance clients. Or you change the subject line depending on whether someone has booked with you before.
Just make sure every email offers some sort of value. Whether it’s saving time, making their shoot better, or helping them stay on schedule, always lead with what matters to them, not just what you want to share.
Encourage Referrals and Reviews
Word-of-mouth often leads to some of the easiest and most trusted sales in photography. When clients have a good experience, they’re usually happy to pass your name along. But they may need a nudge.
You can build a simple referral system that thanks clients who recommend your services. This might involve a small thank-you gift, access to early booking, or a print credit for anyone who sends someone your way. The key is to make the process clear and easy. It could be as simple as asking them to share a link or send an email with a refer-a-friend message.
As for reviews, those are powerful too. A short comment on a public review platform or a tagged post on social media can go a long way toward building trust with potential new clients. It helps people feel less nervous about booking a photographer if they’ve never worked with one before.
To help gather more reviews:
- Ask for them right after the final gallery is sent, when excitement is high
- Share a direct link to the place you want them to post (Google, Facebook, etc.)
- Offer a few writing prompts like “What did you enjoy most?” or “What made the session easy?”
Make this part of your regular workflow. It doesn’t have to be pushy. Just a polite ask, followed by a thank-you, often leads to great results.
Driving Photography Sales with Marketing
Photographers face the constant challenge of getting seen in a noisy space. But the difference between slow seasons and steady work often comes down to having the right plan. Great images will always speak for themselves, but strong marketing gives them a microphone.
Being clear about who you serve, showing up where your audience hangs out, and building steady trust through your website, email, and reviews can all lead to measurable growth. Small, repeated steps like these make a big impact over time.
When you're intentional about where you put your energy, selling your work feels less like a grind and more like a natural part of doing what you love. It becomes easier for the right people to find you and easier to sell photography services without feeling like you're shouting into the void.
To truly thrive in your photography business, understanding the dynamics of sales in photography can make all the difference. By learning effective strategies, you ensure your work reaches the right audience and grows your client base steadily. Explore what PhotoDay® offers to help you streamline your operations and enhance your sales.

Common Photo Storage Issues in High-Volume Photography
High-volume photography has a rhythm of its own. Once the camera starts clicking at school picture days, sports tournaments, or large studio sessions, the images pile up fast. With hundreds or thousands of images to handle at once, photographers face real pressure to keep everything organized, backed up, and easily accessible.
One of the biggest headaches in this type of workflow is digital photo storage. Photographers often find themselves with overloaded hard drives, hard-to-find images, or worse, missing files. Good storage habits can prevent a lot of those problems. But without a plan, it’s easy for things to get messy quickly. Let's take a closer look at the most common photo storage problems and how to avoid them.
Understanding Common Photo Storage Issues
Handling large batches of digital images can sound simple in theory. You take photos, upload them to your device, and move on to editing or selling. In practice, though, it’s rarely that straightforward. High-volume photography turns into high-volume data before you know it.
Here’s what usually goes wrong:
- Limited space: When you’ve shot hundreds of portraits, your devices fill up fast. Even with multiple drives, it’s hard to keep up.
- Disorganization: Without a system, photos get lost in poorly named folders or mixed up with older sessions.
- Slow retrieval time: Searching through cluttered folders can add unnecessary hours to your workflow.
- Manual backups: Relying on hand-managed storage increases the risk of error and data loss.
- Confusing file duplication: Backing up in different places without structure often leads to duplicate files all over the place.
Think about the time wasted looking for images from last season’s school photo day, or the moment you realized your backup drive was full right before a big upload. These are common struggles, and while they're frustrating, they’re fixable.
Organization, smart tools, and modern cloud storage options can help take the pressure off. Storage solutions designed with photographers in mind can keep work flowing, prevent data loss, and help you stay on top of growing file libraries.
Effective Solutions for Storage Space Limitations
The first hurdle photographers usually hit is just running out of space. Memory cards, hard drives, and even local folders get maxed out fast when each project includes hundreds of high-resolution files. That's where cloud-based storage can really help.
By saving your files online, you don’t have to worry about juggling multiple hard drives or accidentally deleting something before it’s backed up. Cloud platforms give you the flexibility to shoot without limits and access your files from almost anywhere. That’s a major plus when you’re managing multiple photo shoots across different locations or clients.
When looking for a solid cloud storage option, choose one with:
- Scalability: You want something that expands with your photo library.
- Remote access: Being able to preview or download files from a laptop or phone is helpful, especially during client meetings or while traveling.
- Automatic backups: This saves time and avoids the risk of forgetting to manually back up your work.
- Security: Your files need to be protected, so make sure your provider encrypts data.
- Smart syncing tools: These make sure your files stay current across different devices.
Tools like these aren't just for tech experts. They make everyday workflow easier for professionals trying to stay focused on shooting, not file handling.
Adding a cloud storage backup to your workflow doesn’t mean throwing out your old hard drives. It just means you’ve got an additional, flexible backup that frees up space and lowers stress. It's like clearing off your desk—you just get more done when it’s not cluttered.
Strategies for Efficient Data Organization
Having a smart storage setup is half the battle, but being able to actually find what you need when you need it—that’s where real efficiency kicks in. Without some basic organization tactics, even the best storage system can feel chaotic. If you’ve ever opened a folder full of random files named IMG_0342 and tried to guess which one your client wants, you know how confusing that can get.
Clear folder naming and consistent file structure are good starters. Try grouping files by date, shoot type, or client. Whatever you choose, stick with it so everything flows together. From there, using metadata and tagging features can help search tools work smarter. When you label your photos with things like event names, subject names, or keywords during import, you won’t need to dig through folders later.
To keep your work structured and searchable:
- Set up a template folder system for every new project (client name, shoot date, type).
- Use descriptive file names to avoid confusion months later.
- Apply standardized metadata tags when importing images.
- Add keywords regularly during editing or uploading to connect related shots.
- Archive completed projects to their own sections so current work stays clean.
Another tip? Look into digital asset management (DAM) tools. These are designed for big media libraries and give you features like advanced sorting, preview displays, and custom tagging. They're especially helpful once your business grows and you’re juggling past seasons' work with new jobs every week.
The goal isn’t to turn into a professional file sorter. It’s to make less effort go further. When everything’s in the right place, the time saved adds up fast.
Ensuring Quick and Easy Retrieval of Photos
No matter how solid your storage or organization is, wasted time finding the right photo can still drag you down. Fast image retrieval isn’t just a nice bonus; it's necessary when clients are waiting and your schedule is already packed. The fewer clicks between you and the file, the better.
Start with a solid indexing method. That could be as easy as exporting shoots into clearly labeled folders and tagging them with event names, age groups, or teams. With the right system applied across the board, you can search by any keyword or sort by tag instead of playing detective every time.
If you're using cloud storage or DAM tools, make good use of their built-in search features. These typically let you filter photos by date, file name, metadata, or even facial recognition and color filters, depending on the platform. That can come in handy when someone asks for the “sibling photo from the spring session” and there are six folders with spring in the name.
Tips for faster access:
- Use dates and specific terms in file and folder names.
- Always tag files during import—not later.
- Keep current projects separate from archives.
- Train your team on how to search inside your system.
Retrieval works best when it’s thought through from the start. Instead of filing photos just to store them, organize them so they’re easy to find again—whether it’s tomorrow or five months from now.
Keeping Your Data Safe and Secure
After all the time spent shooting, editing, and organizing, data loss can be one of the most painful setbacks. And it doesn’t take much: one failed drive, a lost memory card, or a sync error, and hours of work can vanish in seconds. That’s why staying secure isn’t really about tech paranoia. It’s about peace of mind.
First, build a backup habit. Every session should exist in at least two places—ideally three or more. One local copy, one external drive, and one cloud-based backup. That protects against common slip-ups like having a single point of failure or forgetting to back things up before reformatting a card.
Security matters just as much as redundancy. Choose platforms that offer encrypted storage and two-factor authentication. It’s easy to skip a password update or let software go too long without updates, but those cracks can lead to bigger problems.
Simple ways to stay protected:
- Automate backups so they happen without reminders.
- Store copies in different physical locations, including at least one online.
- Use strong passwords and update them regularly.
- Enable two-factor authentication for all accounts.
- Keep software updated to patch system bugs.
Think of your photo archive like your car. You probably wouldn’t skip insurance, right? Even if you don’t need it today, protecting what you’ve worked hard for is always smart.
A Smarter Way to Handle Photo Storage
Staying on top of photo storage doesn't have to be harder than the photos themselves. Yes, the files pile up fast. Yes, the systems can start to feel heavy. But putting systems and workflows in place makes a serious difference.
From organizing your library in smarter ways to choosing platforms that offer better scalability and safety, small changes pay off big time. It’s about making your everyday tasks feel lighter, faster, and less frustrating. More time spent clicking your camera and connecting with clients. Less time digging through folders and dealing with lost files.
Volume photography is challenging enough on the creative side. Your file workflow doesn’t have to add to the chaos. With the right approach, photo storage becomes something that works quietly behind the scenes so you can focus fully on your creative work.
To make your high-volume photography workflow smoother and more efficient, explore the high-volume photography solutions offered by PhotoDay®. These solutions are built to support your photo management system, helping you stay organized, save time, and focus more on your craft instead of getting caught up in storage and retrieval issues.
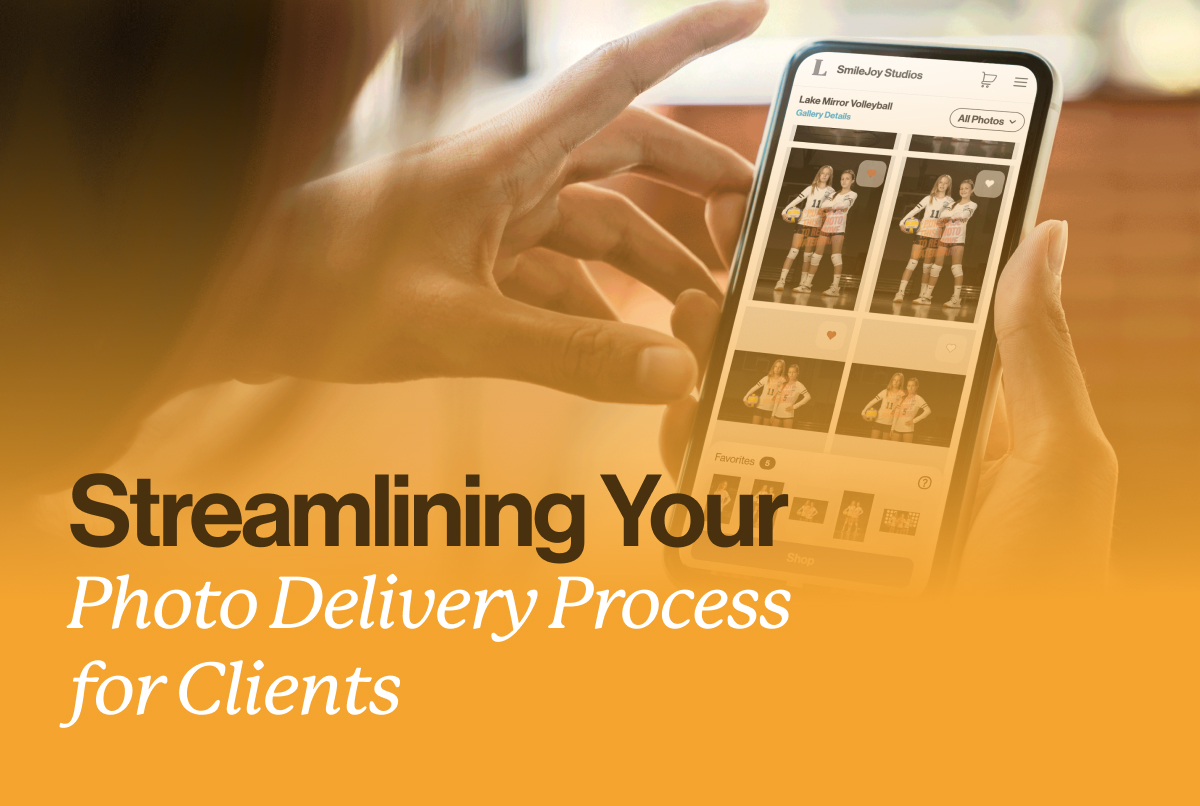
Streamlining Your Photo Delivery Process for Clients
Getting photos to clients should be the easy part of the job. You’ve done the hard work setting up the shoot, capturing the right poses, and making your subjects look great through editing. However, when the delivery process is disorganized or slow, it can undo all that effort. Clients want to see their photos quickly without any extra steps or confusion. If they're left waiting or struggling to access their photos, it leaves a bad impression, no matter how great the pictures look.
Streamlining your photo delivery process brings consistency to your workflow and improves the overall experience for both you and your customers. It can also save time, cut down on back-and-forth communication, and help you stay focused on what you do best—taking great photos. With a few smart moves, you can make delivery smoother and stress-free for everyone involved.
Why Smart Delivery Systems Matter
Timeliness makes a difference, especially when people are waiting to see photos from a big day like a corporate event, school picture day, or a sports championship. Whether you're working with individuals, families, or organizations, fast delivery can increase satisfaction and even lead to more orders or booking requests. Plus, when your system works well, it shows your clients that you've got everything under control.
An organized photo delivery process also helps avoid problems down the line. Sending files through email, juggling USB drives, or manually matching images to orders is not only time-consuming but also easy to mess up. You might miss a file, forget a name, or accidentally send the wrong batch. These common errors can be frustrating for customers and take up a lot of your time to fix.
When your process is smooth, you’ll be more confident, and clients will notice. A reliable system can help you stay focused, especially during your busy seasons. For example, photographers with a streamlined setup—like online galleries and automated text and email marketing—can cull, edit, and deliver their photos faster than ever before. Clients who receive their galleries without delays are happier to place their orders.
How Online Solutions for Photo Sales Improve Delivery
Online photo delivery isn’t just about saving time. It actually changes the way people experience your work. When photos are easy to view, purchase, and share, customers engage more with each image—no digging through long emails or clicking unknown links. An organized, professional platform gives structure to what would otherwise be a messy back-and-forth.
Here’s what makes online platforms so helpful:
- Private online galleries let clients view their photos securely, at their own pace
- Instant previews help people see how images will look in various formats before purchasing
- Built-in ordering enables you to skip the paperwork, so customers can just click and buy
- Mobile-friendly access means people can interact with galleries anywhere, anytime
- Automatic file delivery for digital downloads and drop shipping for physical orders replaces the need for hand-delivery
- Tagging and keyword features help clients find their photos faster, especially for group photo days
With straightforward navigation, simple checkout steps, and auto-generated downloads, an online platform can make life easier for both sides. The experience feels custom without extra stress on your side to keep track of every detail. Whether you’re handling dozens of graduation headshots or hundreds of soccer portraits, online solutions for photo sales can carry the load without complicating things.
Steps to Streamline Your Photo Delivery Process
A solid photo delivery process doesn’t just happen on its own. It takes intention and a bit of planning, but the payoff is enormous. Having a reliable structure helps you work faster, keeps things from falling through the cracks, and gives clients a better experience overall.
Here are a few simple ways to get things running smoother:
- Build a workflow that fits your shooting style.
Every photographer works a little differently. Whether you're photographing school portraits or competitive dance teams, your workflow should match how you organize picture days, edit photos, and prepare galleries. Start from the moment you're uploading files, and think about each step from there. - Keep images sorted and labeled.
Tagging, folders, and clear file names might seem tedious, but they pay off later. Grouping by event, team, costume, class, etc., avoids confusion and makes it easier to batch upload or sort into galleries. - Use online galleries that handle delivery and communication.
The best online solutions aren’t just about sending files. They help you manage galleries, talk to clients, and send updates automatically. Pre-scheduled emails, text alerts, and gallery expiration reminders help guide the whole experience without you having to write one-off messages for each customer. - Automate as much as you can.
From identifying subjects to notifying clients when their photos are ready, automation saves you from hours of manual tasks. Many platforms offer these tools—you just have to set them up once and let them work their magic. - Back up and archive your work.
A reliable storage and backup system ensures you can quickly locate any file. It also makes clients feel more secure knowing their memories aren’t stuck on one hard drive that could fail.
Creating a plan ahead of time helps reduce surprises. For example, if you're covering a five-day dance convention, prepping folder structures and sort tags before the event starts can help you edit and deliver sets to parents within a few days of the final performance. It’s proactive and shows people you’re dependable.
Enhance the Client Experience with Simple Touchpoints
Delivering quickly is one thing, but adding a thoughtful touch builds better relationships. When clients find the entire process smooth from start to finish, they’re more likely to book again and share referrals.
Start by setting expectations early. Let clients know how and when they’ll receive their photos. That heads off unnecessary emails and builds confidence. Next, make browsing and ordering easy. A confusing gallery or cluttered layout can frustrate people who just want to find and save their favorites.
Little extras also make a difference. Offering a way to mark favorite images helps people engage for longer and spend more time reviewing your work. If you're working with schools or sports leagues, custom themes or logos can make each gallery feel more connected to the event.
Don’t overlook the power of clear communication. Send friendly reminders when galleries are live or when purchasing windows are closing. Avoid jargon or stiff language. Keep your tone conversational and direct. It’s simple but keeps your service approachable and professional without being too casual.
Make Every Delivery Day Feel Like Magic
Photo delivery is the final step in the client journey, but it might leave the biggest impression. Taking the time to make this part of your workflow smarter, simpler, and more enjoyable isn’t just something clients appreciate. It’s something they remember.
Whether it’s a parent checking their phone to see their child’s preschool portrait or a high school senior opening up a gallery of their cap-and-gown session, these are important moments! And if the experience is seamless, they’ll associate that great feeling with your photography business.
The tools and habits you build into your photo delivery now will save hours down the line and help each client walk away happy. It doesn't take dozens of bells and whistles. Just some thoughtful steps, a clear workflow, and the right tools to help you do what you’re already doing but better.
Ready to transform your photo delivery into a seamless and efficient process? Explore online solutions for photo sales with PhotoDay®. Experience the ease of a streamlined system that enhances both your workflow and your clients' experience, ensuring every delivery leaves a lasting impression.


